
Overview
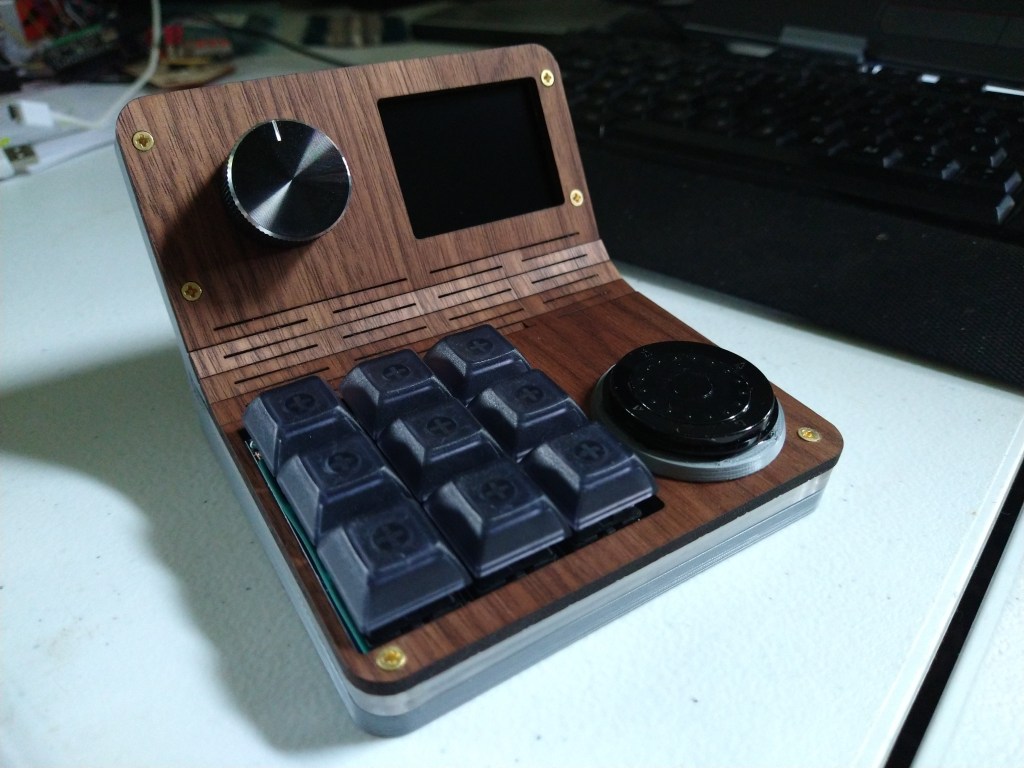
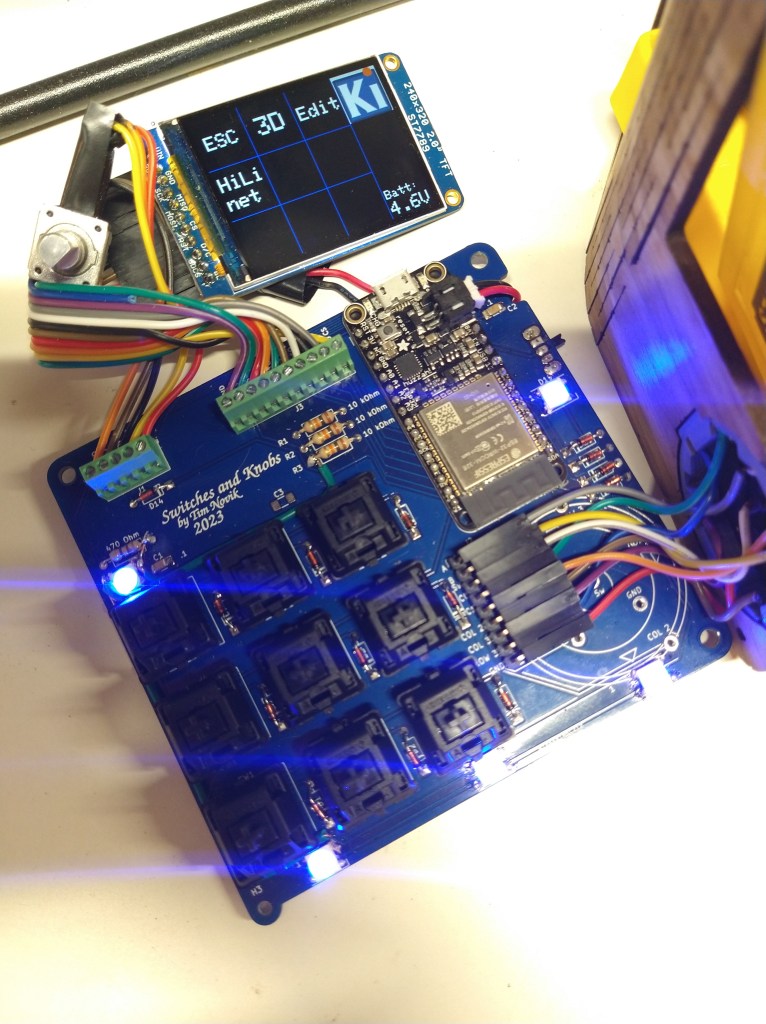
My local makerspace hosted a class where you design and built a macropad, which for those that don’t know is a little programmable keypad that you keep next to your computer. Each key can be assigned a different function, such as raising/lowering volume or performing a multi-key shortcut in a program you use frequently. The design provided by the instructor had 6 keys and a knob, which would provide a decent amount of supplemental functionality, but I wanted to be able to have a group of shortcut keys for each of the programs I use regularly, not be stuck with just one. It took me a while to emerge from the subsequent rabbit hole, but I ended up with a gadget that I was happy to use day-to-day. My computer sees it as a Bluetooth keyboard, so it’s easy to connect and use wirelessly, it has a screen that lets me scroll through presets for different applications, and there are RGB LEDs around the outside to both give it some pizzazz and to give me a visual clue regarding what preset I’m in.
Design
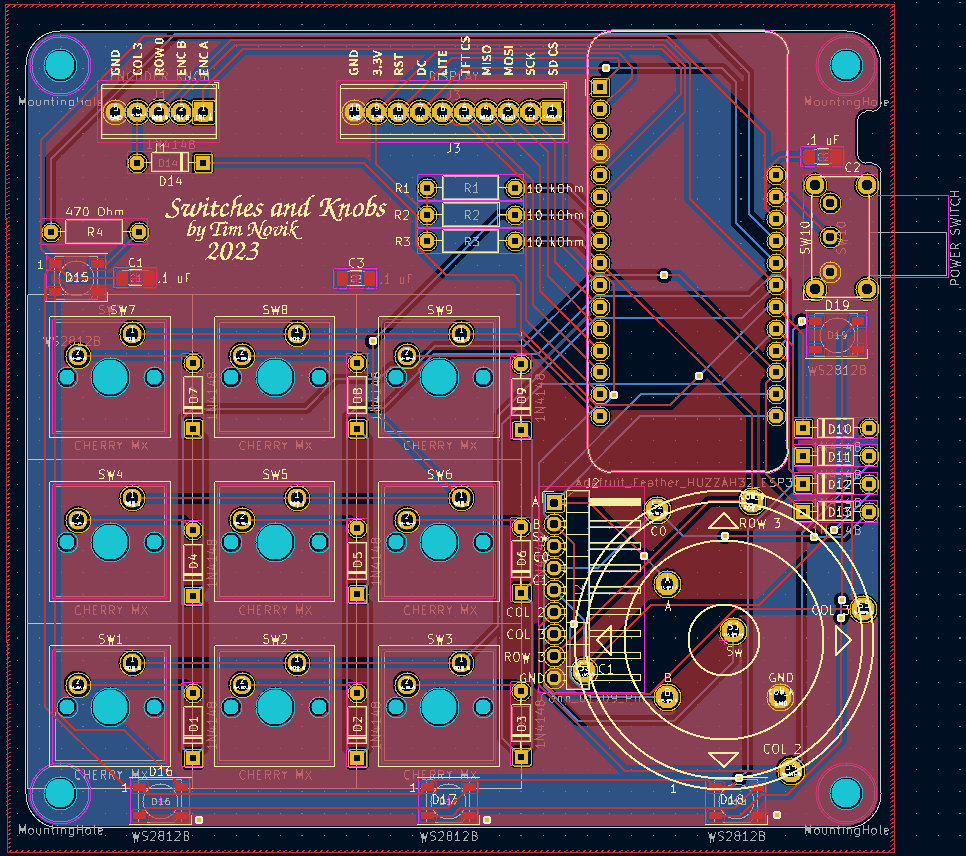
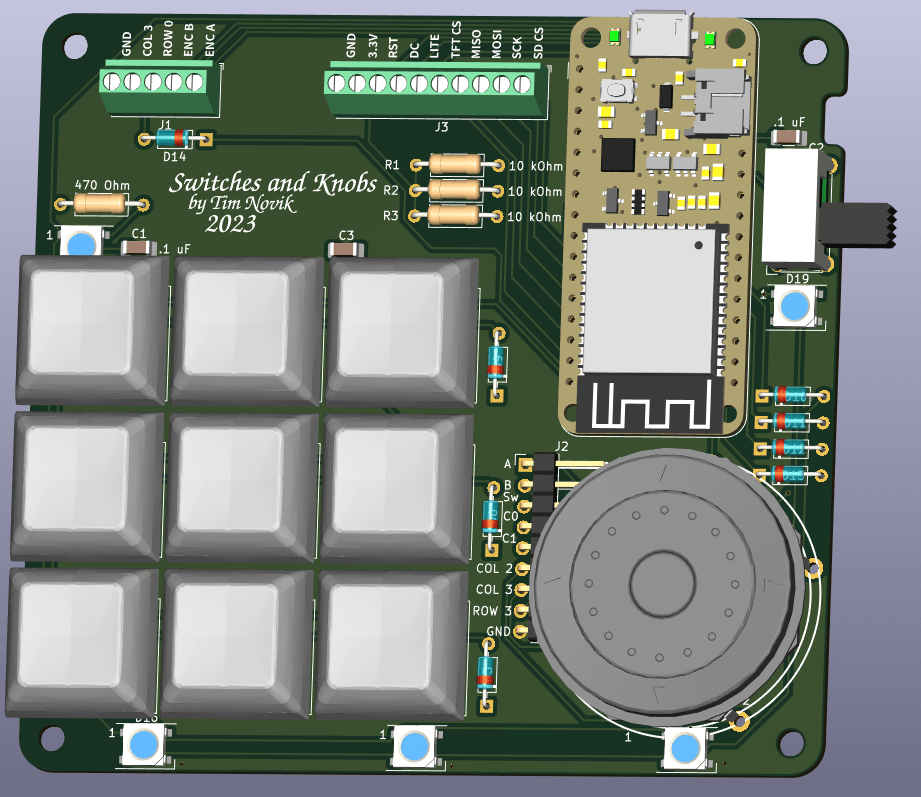
This was the second circuit board I had ever made, with the first one being a simple voltage tester that I made as part of a KiCAD class. KiCAD is a printed circuit board (PCB) design program that’s completely free and open source. One incredibly useful feature is the ability to export a 3D model of a completed PCB, parts and all, making it much easier to design an enclosure around it. I initially started the case design in FreeCAD, but was forced to move to OnShape when the complexity of the model made FreeCAD unable to properly adjust when I made small changes to the assembly.
Hardware
Making the enclosure involved a combination of 3D printing, laser cutting, and woodworking. I wanted to give the device a Star Trek original series look/feel, and I think that between the walnut top and general form factor I got pretty close. I got the walnut to bend by cutting a “living hinge” into it, which is a series of small, parallel cuts that allow the wood to flex just enough to bend into the shape I wanted. Living hinges would fail quickly if subject to cyclic loading (bending back and forth a bunch), but the rest of the case held the walnut fast once it was in position.
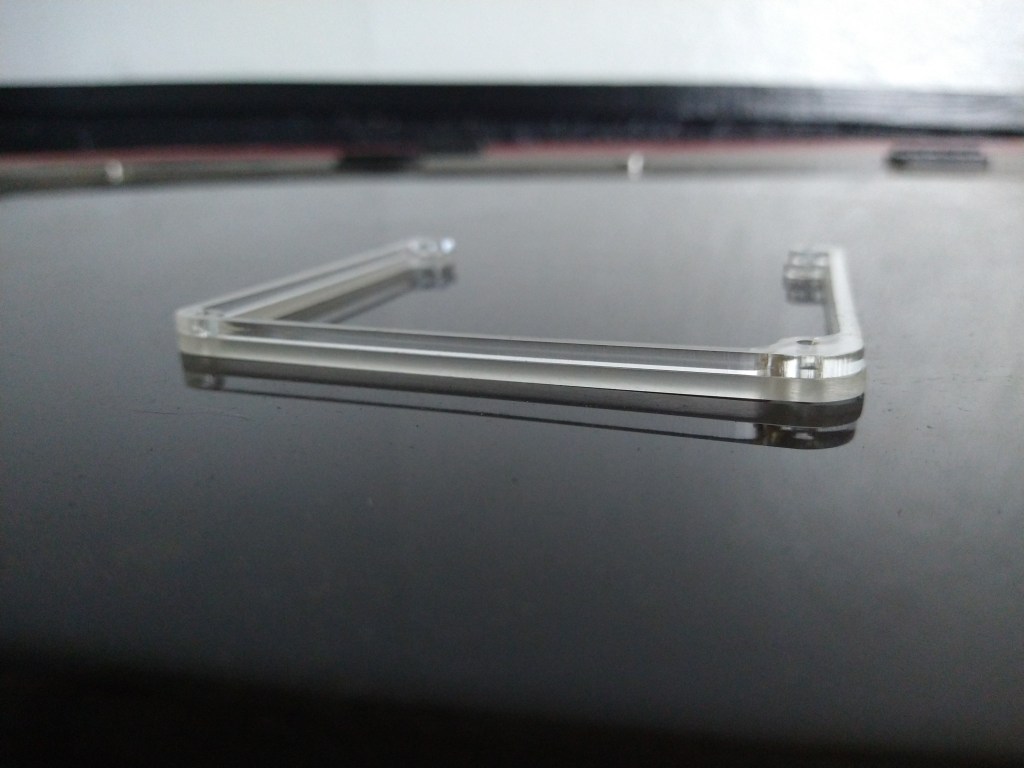
The center layer of the case is clear acrylic that I cut into shape using a CO2 laser. I sanded the outside of the acrylic to give the LED lighting a more diffuse look.
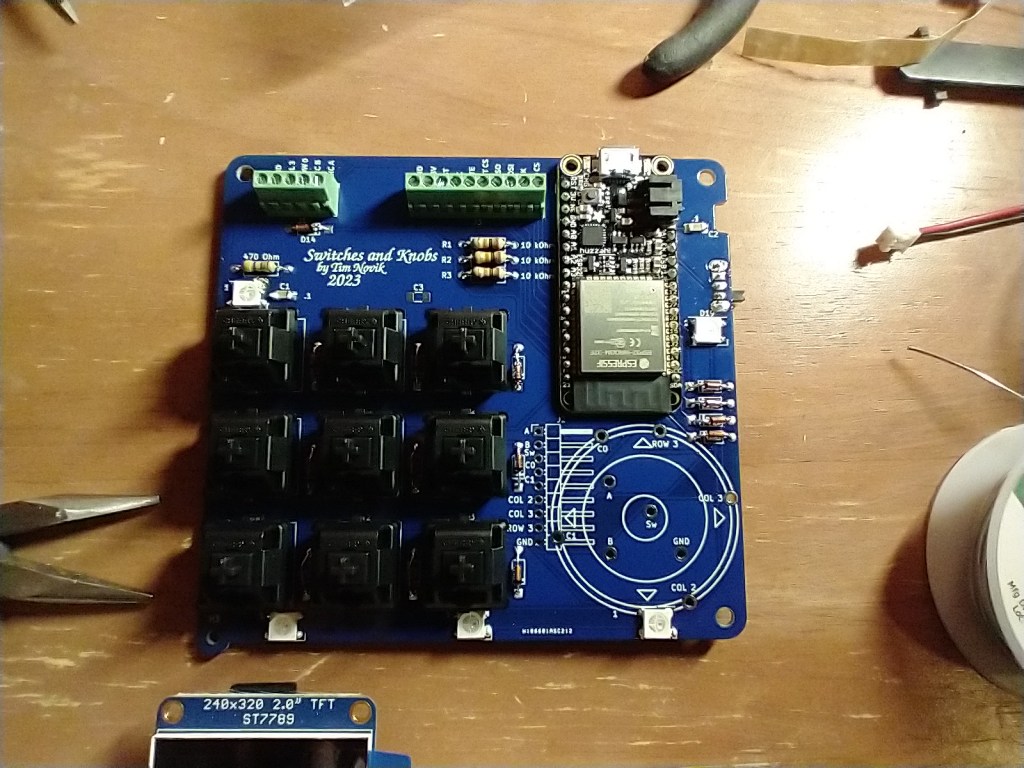
Code
Simpler macropads can use a pre-made keyboard firmware, such as QMK, to quickly program their keys. Since my macropad had an entire user interface built in, I had to write my own code. I used Arduino IDE, which allowed me to use many helpful libraries developed by other (such as Adafruit). If I had to start the project over again, I’d probably use either Micro Python or Circuit Python; both make it easy to open the microcontroller’s file system like a thumb drive and paste in new code without needing to recompile it. This is helpful when, for example, I want to add a new set of macros to the device.
Tools and Skills Used
- Software
- KiCAD
- FreeCAD
- OnShape
- Arduino IDE
- Skills
- PCB Design
- CAD
- Laser cutting
- Design for assembly
- Woodworking
- 3D printing
- Electronics
- Software development

Leave a comment