
Overview
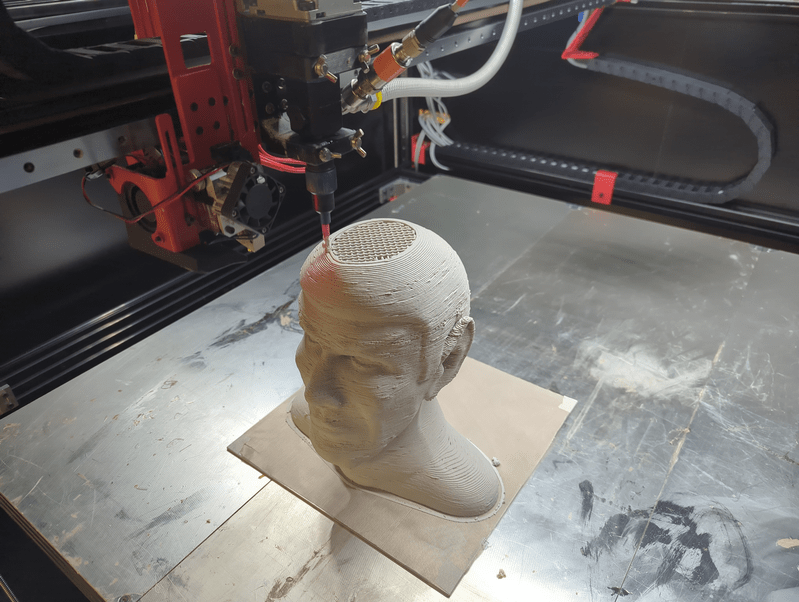
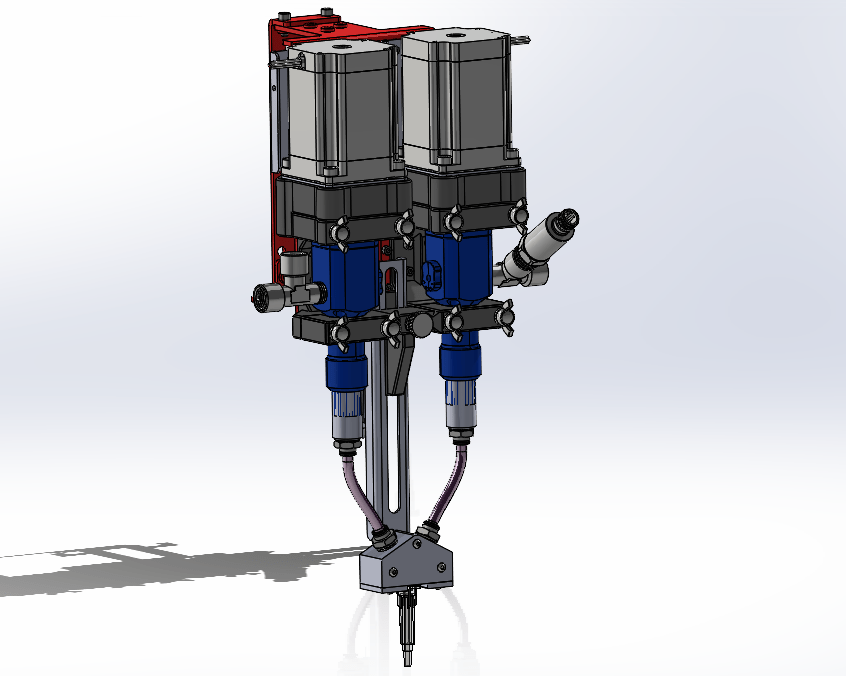
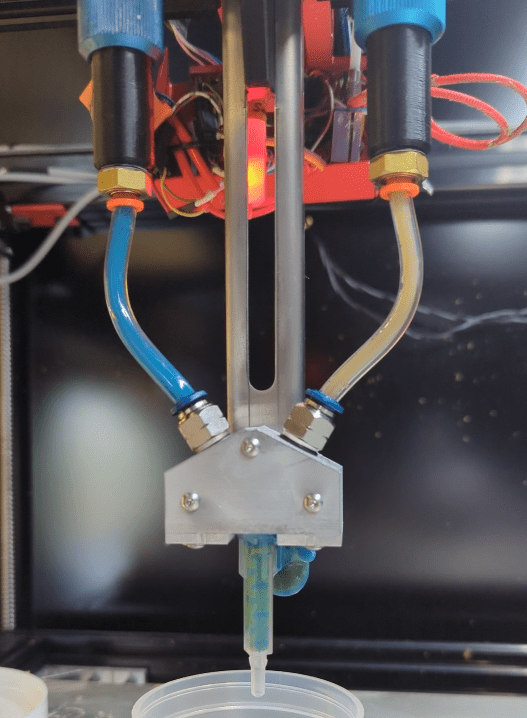
One of my favorite recent (and ongoing) professional projects is the conversion of a large-ish (1 cubic meter build volume) filament 3D printer into a dual-head thermoset printer that can print with any number of goopy materials. One advantage of printing with thermosets is that you can really dial in your material properties while mixing your batches of print media. A little more stiffness or a little less thermal conductivity, for example, can be had by adjusting your recipe at mixing time. One disadvantage, however, is that you need to be able to pump this rather thick material from a cartridge or bucket through a length of tubing out to your extruder. Rather than having a little stepper motor push or pull your filament along, you now have to deal with pressures exceeding several hundred psi.
The university lab (University of Tennessee, Knoxville) that hired me to build this system is made up primarily of students researching how to improve the printing materials themselves. My part to play is to develop and improve the hardware that those materials are printed with. The goal is to make a system that can be used by someone with minimal training and as invisibly as possible. In other words, once someone turns it on, it should take care of itself the entire time the printer is running.
Brainstorming
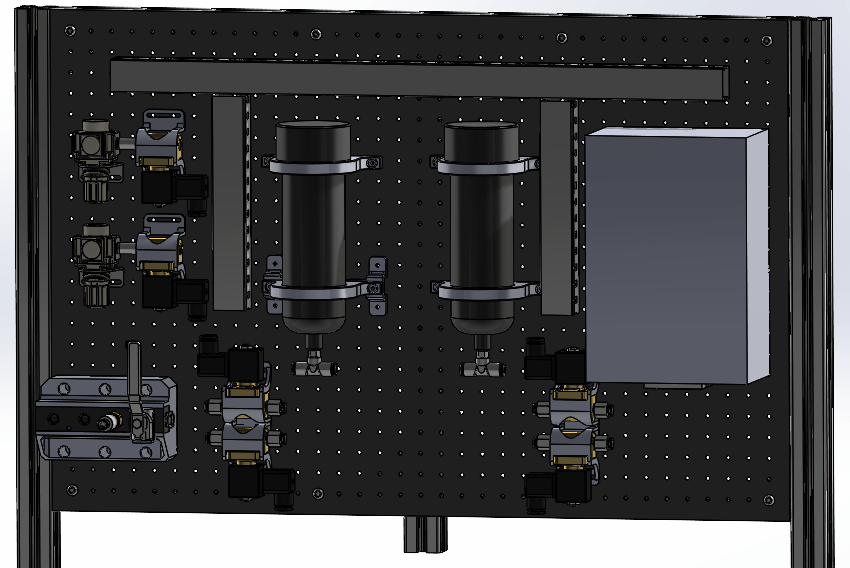
While we were still working out how this type of system might work, good hydraulic design practices suggested that we should include an “accumulator”, which is a bit like a little pressurized storage tank between the pump and extruder that evens out spikes and dips in pressure. Maintaining pressure out to the extruder helps prevent the extruder from running out of material in the middle of a print. A drop in pressure might mean that material isn’t getting out to the extruder fast enough, which can cause gaps in the print, possibly ruining it.
After some initial experimentation, I found out that our print material is so thick that the lab’s 100 psi air pressure wasn’t enough to push material back out of an accumulator after it filled up. This was frustrating at first, but the solution ended up being wonderfully simple: remove the accumulator entirely. I came upon some reinforced flexible tubing that hit a balance between strength and stretchiness that allowed it to handle our pump pressure while at the same time smoothing out material flow, reducing both complexity and cost from the design.
Hardware
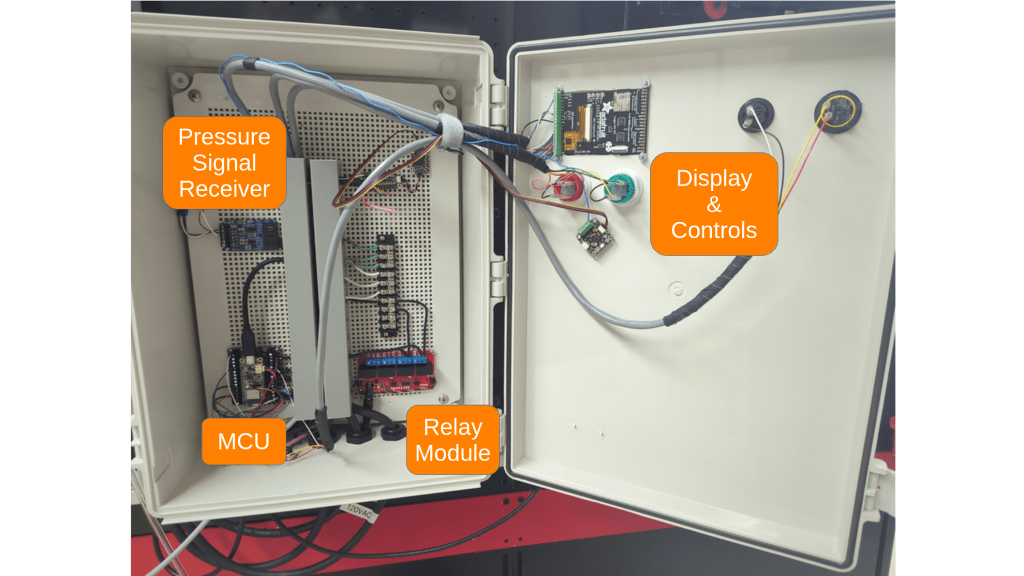
While there are purpose-built industrial pumps for moving materials that vary in thickness from “like honey” to “literally clay”, they have quite a premium price tag. Commodity-grade grease pumps, on the other hand, are capable pushing thick materials while handling pressures upwards of 5000 psi at a much more reasonable price point. They don’t tend to have any sort of controls apart from an air pressure input to cycle the pump, so I came up with my own using an ESP32-based microcontroller and some solenoid valves. The microcontroller keeps an eye on the pressures at the pump and at the extruder, and turns the pump on and off as needed to keep both within a range that keeps the printer going without running out of material. It’s incredible how much code it takes to essentially flip a light switch on and off: I’m at about 800 lines of code (not counting imported libraries). Most of the code is for drawing a user interface on the screen of the control box, with a majority of the rest telling the microcontroller how to read and record pressure data to a microSD card.
Tools and skills used
- Software:
- Solidworks
- Arduino IDE/Git
- Excel (misc. calculations)
- Skills:
- System integration
- Machine design
- CAD/CAM
- Microcontroller programming
- 3D printing
- Sheet metal manufacturing
- Hydraulics
- Electronics
- Design for assembly

Leave a comment